填坑
上一篇文章我还在埋怨eos中的智能合约怎么没有以太坊类似的关键字payable呢?看来只有时间才会回答我的这个问题哈.也怪我图样图森破了
前言
- 想想距离上次写文章已经过去了快2个月了,而且已经翻了一年了,回想一下去年都做了什么呢?忘了…. 那是什么让我停下了呢?
- 工作,毕竟要靠这个混口饭吃,心累…
- 因为个人原因,周末都在往医院跑,
- 这个eos的知识点是我周末和下班浏览得到的一点知识,主要是现在我在百度也没有找到比较合适的eos智能合约开发教程,所以就把我的这一路走过来的知识点记录下来.我的工作主要也是做智能合约的开发,所以了解一下也是为了未来失业了多一点选择.而目前公司都是基于以太坊和波场的,所以重点我还是会放到公司的项目中来
- 至于其他的零碎时间都没有打开电脑了,只是补习了一些c++的知识,虽然我有java功底,但是对与没有常写c++的我来说,语法对我来说不是很难,难在如何动笔写,如何组织代码结构和写出c++的风格
- 在之前的文章中,我们得智能合约能够跑起来,也能够产生各种交互了.这也得益于官方的文档不断的更新,而我也止步于这个地方了,而对于官方智能合约的最后一篇文章,dispatcher的使用我选择了跳过.
- 近段时间和几个加我微信好友的开发者一起探讨上面的坑的时候,又回去阅读了几遍官方的教程,再结合Google,那暂时把得到的一点知识分享给大家,希望能够对你有帮助.
什么是EOSIO_DISPATCH
本篇文章我们先跟着上面的链接,把dispatcher的基础信息弄明白,然后再谈其他的哈.而我也会根据自己的理解像大家解释一下,如果有不对的地方,希望各位同学帮我指正过来
EOSIO_DISPATCH( myclass, (upsert)(notify)(erase) )
相信这个大家都知道是c++的宏,帮组eos的合约分发action,那么这个宏的具体定义是什么呢?我们来到源码看看
dispatcher.cpp (这里的eos源码还是EOSIO_ABI,在cdt1.3后改为了EOS_DISPATCHER,只是宏名字改了,内容不变)
/**
 * Convenient macro to create contract apply handler
 * To be able to use this macro, the contract needs to be derived from eosio::contract
 *
 * @brief Convenient macro to create contract apply handler
 * @param TYPE - The class name of the contract
 * @param MEMBERS - The sequence of available actions supported by this contract
 *
 * Example:
 * @code
 * EOSIO_ABI( eosio::bios, (setpriv)(setalimits)(setglimits)(setprods)(reqauth) )
 * @endcode
 */
#define EOSIO_ABI( TYPE, MEMBERS ) \
extern "C" { \
   void apply( uint64_t receiver, uint64_t code, uint64_t action ) { \
      auto self = receiver; \
      if( action == N(onerror)) { \
         /* onerror is only valid if it is for the "eosio" code account and authorized by "eosio"'s "active permission */ \
         eosio_assert(code == N(eosio), "onerror action's are only valid from the \"eosio\" system account"); \
      } \
      if( code == self || action == N(onerror) ) { \
         TYPE thiscontract( self ); \
         switch( action ) { \
            EOSIO_API( TYPE, MEMBERS ) \
         } \
         /* does not allow destructor of thiscontract to run: eosio_exit(0); */ \
      } \
   } \
} \
看到了这个宏的具体实现,应该说这个函数在比较古老的版本,需要自己实现的,后面eos为了简化开发者的工作,才定义了这个宏.后面很多的宏比如说ACTION, CONTRACT也都是如此.这个宏的具体用法请看上面的注释,结果就是我们现在写合约的使用方式了.这个dispatcher.cpp建议大家可以深入了解一下,对后面的智能合约开发或者出现的bug都会有更加深一步的看法
这里还有一个关键点就是,我们的智能合约如果要能够使用,必须提供一个apply的函数,而上面的宏就是帮助我们实现的这个apply函数.那么疑问来了,我是不是自己实现一个apply函数,不用上面的宏,也可以完成这个工作呢?
答案是可以的
自定义dispatcher 方式1
这里同样跟着官方的教程走
extern "C" {
    void apply(uint64_t receiver, uint64_t code, uint64_t action) {
        auto self = receiver;
        if( code == self ) {
          addressbook _addressbook(name(receiver));
          switch(action) {
            case name("upsert").value:
              execute_action(name(receiver), name(code), &addressbook::upsert);
              break;
            case name("notify").value:
              execute_action(name(receiver), name(code), &addressbook::notify);
              break;
            case name("erase").value:
              execute_action(name(receiver), name(code), &addressbook::erase);
              break;
          }
        }
    }
};
1.
- 可以看到apply函数接收三个参数,第一个receiver,合约的拥有者,
- 第二个参数code,调用合约的发起人(这个参数我理解为通过什么方式调用的,如果直接通过调用本合约的,这个参数就是self,而如果通过其他智能合约比如说eosio.token,这个code就是eosio.token,或者其他合约的拥有者)
- 第三个,执行合约的action,也就是合约的函数名,这个合约被标识为action
- if中判断如果合约的调用者是直接调用此合约的,即不是通过其他合约调用本合约的
- 实例化addressbook这个类,(这里有点疑惑的是,这个_addressbook在这里代表的是类,而addressbook才是对象,没有明白这是为什么,在c++ 中实例化一个类不是 T t 这种形式吗?),这个实例化比较古老了,只接受了一个参数,在cdt1.3要接受三个参数,请注意
- 一个switch结构,根据对应的action的名字分发对应的动作
使用eosio::execute_action执行对应的action
这里大家又看到了一个新的东西了,不要怕,我们看看是什么
   /**
 * @defgroup dispatcher Dispatcher API
 * @brief Defines functions to dispatch action to proper action handler inside a contract
 * @ingroup contractdev
 */

/**
 * @defgroup dispatchercpp Dispatcher C++ API
 * @brief Defines C++ functions to dispatch action to proper action handler inside a contract
 * @ingroup dispatcher
 * @{
 */

/**
 * Unpack the received action and execute the correponding action handler
 *
 * @brief Unpack the received action and execute the correponding action handler
 * @tparam T - The contract class that has the correponding action handler, this contract should be derived from eosio::contract
 * @tparam Q - The namespace of the action handler function
 * @tparam Args - The arguments that the action handler accepts, i.e. members of the action
 * @param obj - The contract object that has the correponding action handler
 * @param func - The action handler
 * @return true
 */
template<typename T, typename Q, typename... Args>
bool execute_action( T* obj, void (Q::*func)(Args...)  ) {
...
}
这里我把具体实现删掉了,只留下了注释和方法签名,可以看到是一个模板函数,那我们就看看他的作用是什么了
Unpack the received action and execute the correponding action handler 解压缩收到的操作并执行相应的操作处理程序- 再结合上面的具体的参数的用法,就知道了原来又是一个dispatcher的帮助函数,帮我们去分发对应的action,只是传递的方式变了.
- 很好,现在我们已经抛弃了系统提供的EOSIO_DISPATCH而自己实现了这个apply函数,至于能不能用呢?那我们接下来试试了
自定义dispatcher 方式1 结果展示
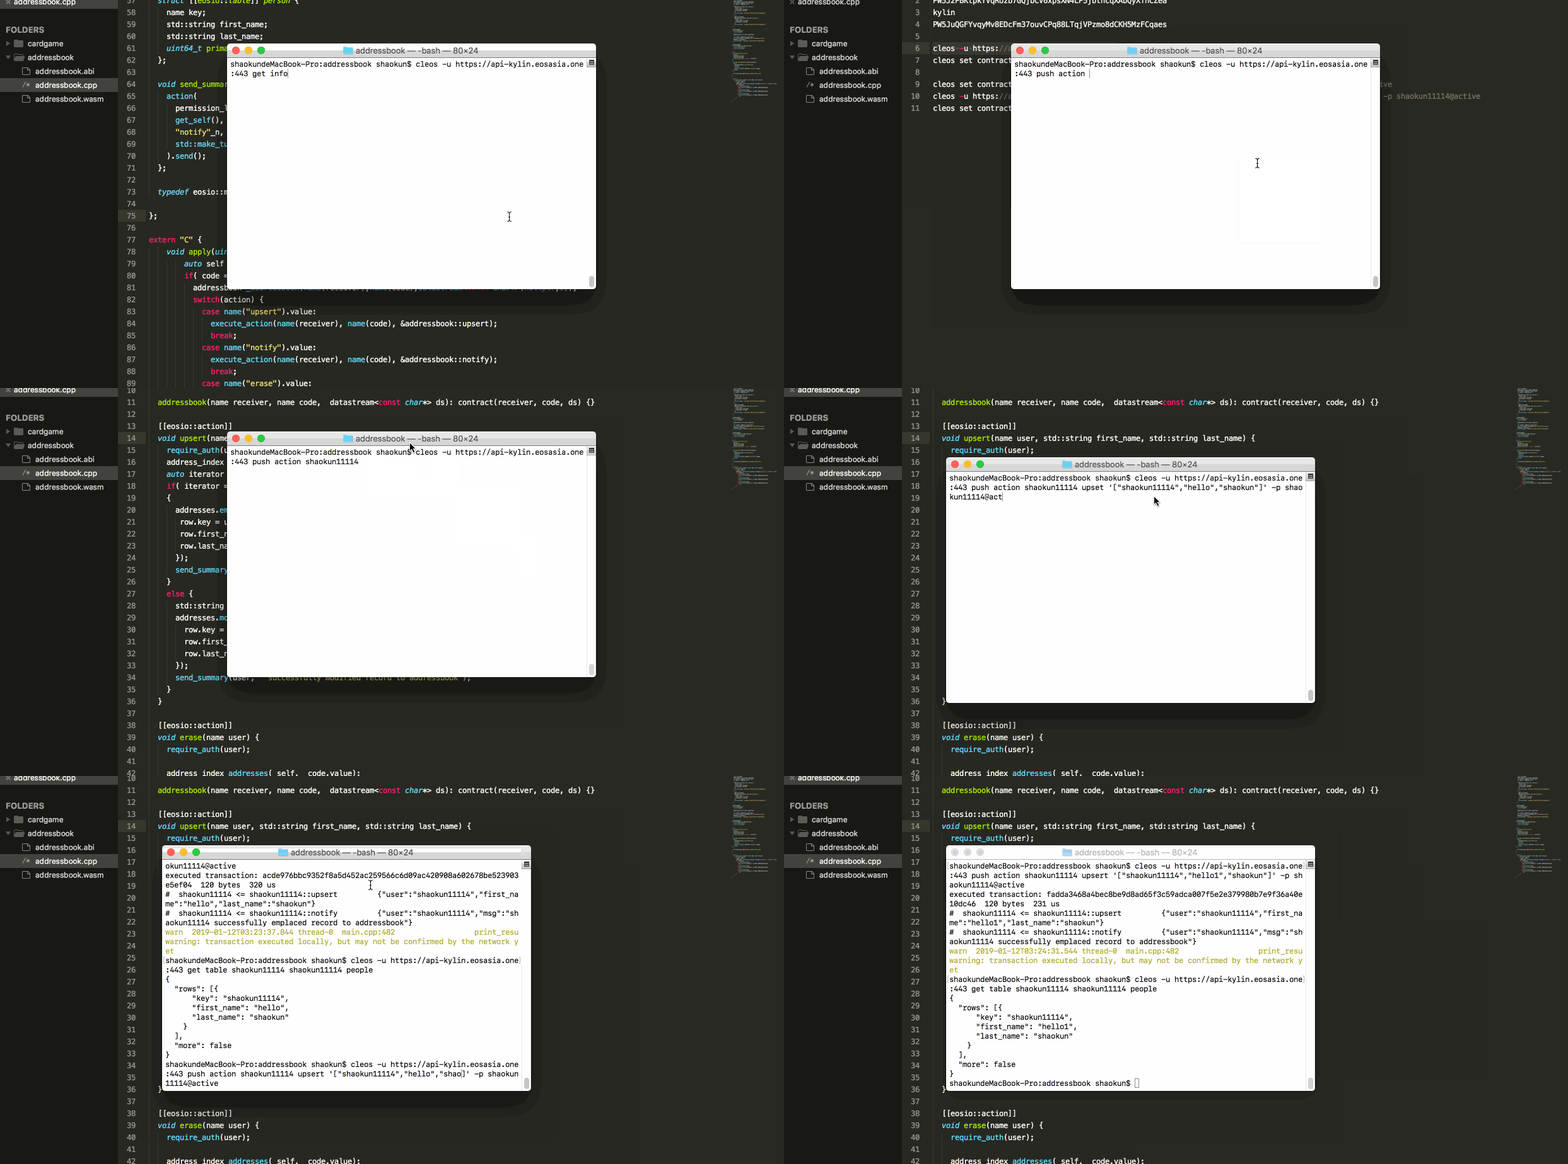
本次我们直接copy的官方的addressbook的源码,然后使用自己实现apply函数
精简一些不必要的参数,实现功能为主
上面我说过,由于版本的原因,目前的版本我们需要在实例化addressbook的时候传入三个参数
addressbook _addressbook(name(receiver),name(code),datastream<const char*>(nullptr,0));
最终改造了的代码如下
1 | #include <eosiolib/eosio.hpp> |
结果展示
- 此次合约部署在kylin上的shaokun11114账号上可以看到我们也完美实现了数据增加和删除

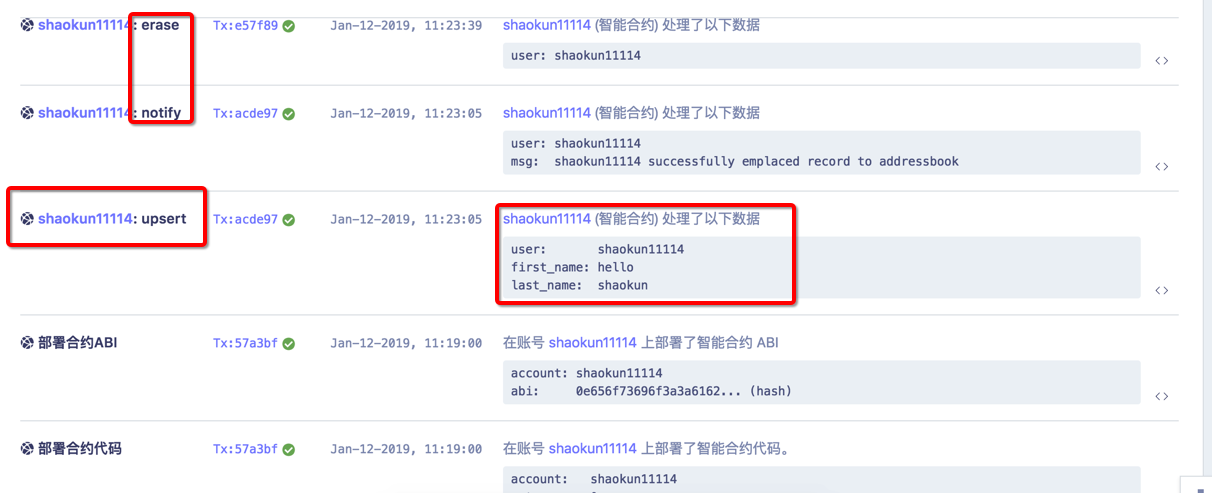
- 去kylin查看结果,可以看到我们得交易记录,其中的notify也可以看到,说明apply函数正常使用

总结
- 这就完了?当然没有,这篇文章只是简单的和大家一起走走官网的dispatcher,当然还没有走完,如果只是这样写了能够实现功能那和用eos提供的宏没什么区别了呢
- 我建议各位同学接触到错误不要慌,也不要急,各位可以先自己看看报错误的信息提示,可以把这个粘贴到Google上找一下答案,这样自己找寻到的答案记忆会深刻许多
- 接下来将我进一步跟着官网走,把剩下的一点点讲明白,而这才是dispatcher的真正用法呢.可以解决文章开头提到的payable的问题呢
- 谢谢大家的浏览,希望有发现错误的同学可以加上我微信帮我指出来,再次感谢.
关于我
区块链技术痴迷的程序猿一枚,如果你喜欢我的文章,可以加上微信共同学习,共同进步。